2017-11-19

15mm Shermans Galore

Those who know me, might know that I have a certain... fascination for the Sherman tank of WW2 (the word fetish has also been used...).. But after putting all my US Shermans on a table, I must ask myself a question. Is it possible to have too many Shermans?

All of these are in 15mm scale (or 1/100th scale), and were painted with Flames of War in mind, which makes me even more annoyed that I can't appreciate (or stand) the rules as they are in the new version.

Anyway, let's do an inventory together.


First up is Able Company. These are in fact some of the first 15mm models I painted, and it's noticeable in places. There's also a fair bit of wear and tear (especially machine guns that's been broken of, or lost a barrel). I've considered repairing and repainting these, and if/when I get back into 15mm World War 2 tabletop again, I think I will (the good thing about historical games, you're not tied to a single rules system, so when that rules system goes belly up or becomes unpalatable, it's just to get a new rule system).


First up, first platoon. 5 Sherman M4A1 with 76mm guns. They painted for Normandy '44, but can of course be used for games (and lists) set later than that as well. It's just that the black camo was mostly used (as far as I could tell) during Normandy, after that the US army simply didn't bother with camo, the Olive Drab of the Shermans were good enough (unless it was snowing, then some kind of whitewash was used).


Second platoon, equipped with M4A1s with 75mm guns. Painted similarly to first platoon. The tank commander sitting in an open hatch serves to denote the platoon command vehicle. Furthermore, every platoon command vehicles has an air recognition panel on the engine deck or the back of the turret that is clear yellow, making identification in the heat of a game that much easier. Of course, Platoon Command Vehicle recognition is no longer quite as important in the new Flames of War rules. (no, I'm not miffed at all, what makes you think that?)


Third platoon, with another 5 M4A1(75)s. These were painted to be able to use the list for games set earlier than Normandy, as well as when playing 4th, 5th or 6th Armored Division during Normandy, before those got equipped with 76mm armed Shermans). The fact that I thus had a full company was kind of an added bonus.


Finally, the HQ for Able Company. The Company Commander, front and centre, in a Sherman M4A1, the Company Second-in-Command in an M4 to the left of the image (incidentally, my very first 15mm Sherman) and finally an M4(105mm) back and out of focus, for when it's not attached to the battalion support platoon. Initially, HQ couldn't be equipped with 76mm armed Shermans (they were only available in a single platoon during Normandy)


As lists changed and the war moved on, 76mm Shermans got a bit more widespread, and HQ units could now take them. Hence, an alternative Company Commander, in an M4A1(76). I try to always have two occupied and open hatches for Company Commanders and higher command teams, to make them somewhat easy to spot on the table.


Next up, as the war moved on and improved Shermans became available, we have Baker Company.


First platoon, equipped with a pair of M4A3E8(76), commonly known as Easy Eights, an M4A3E2 Jumbo, as well as a pair of more ordinary M4A3s, one with a 105mm gun, the other with a 75mm gun. This platoon has on occasion been nicknamed the Anvil, since that's more or less how it's used, as a barely moveable, surprisingly resilient piece of hardware for the enemy to be crushed upon.

Second platoon is somewhat similarly equipped, with a pair of M4A3(76) and a pair of M4A3(75). Fifth tank (or first, since it's the platoon commander when present) is another M4A3E2 Jumbo. Has been nicknamed the hammer, since (when without the Jumbo), it can be used to flank around and drive enemies onto the anvil.


Third platoon does not have quite as refined a role. A pair of M4A3(76) and a trio of M4A3(75)s, with the better part of an infantry company allotment of sandbags to provide some extra protection.


Finally, the HQ. Another M4A3E8, Daring, and an M4A3E2 Jumbo equipped with an 76mm gun (a common field conversion), ironically named Speedy. Finally, the company recovery vehicle.


Add to that the battalion support platoon of 6 M4A3(105) Shermans... well, strictly the platoon only had 3 105's, but another 3 were allocated to the 3 Medium Tank Companies in the battalion, and commonly regrouped to the support platoon. Anyway, add those...


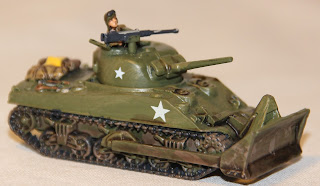
... and a Sherman equipped with a bulldozer (always useful to have, as long as you don't mind loosing the hull machine gun).


And then a Battalion Commander. Well strictly, this is a specific Hero, Creighton Abrams (awesome dude and tank commander). The observant might note that there's two tanks. These are both Creighton Abrams, in his Thunderbolt VI (left), an M4A3(76), and his Thunderbolt VII (right), an M4A3E8(76) he got once Thunderbolt VI was run into the ground during the Battle of the Bulge.


Anyway, add all that, Able Company...


... and Baker Company...


... and you get the better part of a Tank Battalion. A Tank Battalion consisted of 3 Medium Tank Companies equipped with Shermans (and I have 2), one Light Tank Company with M3/M5 Stuarts or, later in the war, M24 Chaffees (I currently have a single platoon of 5 M5 Stuarts), a Battalion HQ with 2 Shermans, a platoon of 105mm Shermans (seen above), another platoon of M4 Mortar Carriers (which I also have) and various non-armored support elements.

So. Do I have too many Shermans? Or do I not, and should instead go for that third company, and a Light Tank Company to round it off? If I were to do that, I would probably go for Baker getting more Easy Eights (3 in each of the first two platoons), moving the M4A3(76) to Charlie Companys first and second platoon (fill up with M4A3(75)s), and a platoon of early M4A1s to stand in for 1st platoon, Able Company when fielded before the introduction of 76mm guns.

/Fool out

2017-11-16

SAGA - Norman warband

From a boatload of vikings, to a somewhat smaller band of french farmers and viking settlers; my Norman warband for SAGA (and other Dark Age historical miniature wargames)


Now, while my Vikings could be classified as an army, the Normans are not nearly as many, and the SAGA term of Warband seems fitting. They might be expanded in the future (especially if some of the SAGA v2 rumours are true, but for now they seem fixed)


First up, Levies. Norman Peasants armed with bows. Normans is one of the factions that have significiant use of levies, with several abilities to enhance these, both in hitting power and range (a very nice trick to play when the opponent thinks himself safely out of range). A few coats of maille might occur, but they're generally unarmoured and armed with nothing heavier than daggers and hatchets. Well, aside from their bows of course.


The first unit of Warriors, and the one Normans never should leave home without: crossbowmen. Crossbows act like bows, but better (specifically, they have an easier time by lowering the armour/to-hit-number of the target). However, while a Norman warband can have as many units of levies as they want, they're limited to a single unit of crossbowmen, of no more than 8 models. One might notice a kind of theme for the Normans so far with ranged units. That is in fact half the theme of the Normans.


Distinguishing between different Warrior units is generally easy, but as an added help, their sheilds follow a theme. The first unit have red shields with a single white line (straight or crooked), the second have two white lines on their red shields, and the third and fourth have three and four lines. It gives a nice look, and somewhat more regimented than the wild vikings. Of course, since the first unit is crossbowmen who are generally unarmed, there aren't that many shields with a single white line.


The second and third unit of Warriors showcase the other half of the Norman theme: cavalry. Horses are faster than infantry, but a bigger target (and thus easier to hit) for arrows and bolts. These two units are each 4 figures strong, but can be fielded together for an 8 strong unit. If/when the Normans gets expanded, these will be increased to a pair of 8 strong units. But that would require me to paint more horses...


Finally, the fourth unit of Warriors, foot spearmen this time. They're rarely fielded because they do very few things that can't be accomplished just as well with mounted Warriors. Still, since I had the figures for it (bought to convert some to crossbowmen), it was just as easy to paint up a unit, just in case.


The Hearthguards of the warband, Norman Knights, are also mounted and provides a fast, hard-hitting force. Currently, I have two units of 6, my preferred way of fielding Hearthguards, but these will be expanded to units of 8 at the same time as my mounted Warriors for more versatility.


Differentiating between the two units of hearthguards are easy. The first have red shields with straight white crosses, while the second instead have more crooked crosses. Once again, keeping it regimented with the same colours and similar shapes, but with noticeable differences both between individuals and units.


Finally, the Warlord himself. Since mounted Warlords get a slightly larger base /up to 60mm diameter), it can look a bit empty with just the single model on it, even if horses take up a larger space. The solution is obviously to have a second horse and rider as a bannerman (he is ignored in all interactions with rules, serving only as an extra marker for the Warlord).

All models are plastics from Conquest Games, their Medieval Archers, Norman Infantry and Norman Knights box sets. The crossbowmen are converted from the archers (and a few infantry) bit metal crossbows from somewhere (I've forgotten where exactly). The Norman Infantry contain 44 bodies. I have so far used 10 or so, leaving me with many more. Well, Normans surprisingly often used mercenaries, so why not use a few bodies for that?


8 generic Mercenary Warriors, for use by any faction when I need more foot troops. Also, since I had no theme for their shields, and in fact wanted it to be a random assortment of everything, I could throw in some "special" symbols in there. Highly amusing, at least for me.


Also, 8 Flemsih Mercenaries. These can either be used as generic warriors, if one ignores that they're all carrying maille, generic-ish hearthguards, since they're well armoured, or special Flemish Mercenaries that Stuido Tomahawk (the creators of SAGA) has put out rules for (let's hope the rules for those carry over to SAGA v2). If acting as Flemish, they would work essentially as a somewhat mobile house full of warriors. They fight as warriors, but have better armour and a shield wall that provides further protection. However, due to all this armour, they're slowed down and can only advance slowly.

/Fool out

2017-11-12

SAGA - Viking army for SAGA

VIKINGS!

Specifically, my Viking army, built and intended for SAGA. But as with most historical miniatures, they can easily be used for other systems, possibly with some adaptation of the basing. Since it's intended for SAGA, I will mostly write about it in terms of SAGA, but with occasional notes as to what the figures are and how they can be fielded. It will obviously be easier to adapt it to skirmish wargames, where figures usually aren't fielded in closed ranks, due to the round bases.


People would usually argue that what you field in SAGA is not worthy of the term Army. And I would usually agree, what you're fielding is more of a raiding force. SAGA even uses the term "Warband" for your force, not something more grandiose. But with my vikings, I think they can rightfully be called an army, since I have so many of the buggers. Just look at the image above. Looks like an army to me, at least by miniature wargaming standards.


First up, and least impressive, are the Levies. Bow-armed thralls, old men and boys not yet grown up, fielded to make up manpower. More of an annoyance than a real force on the battlefield. Levies are a rare sight in Viking warbands, but they might be useful on occasion with that ability to reach out and touch someone, since they're the only viking unit with ranged weapons. Still, your often better of with a bundle of competent warriors that can charge in and hew to. A few of the old men might have their old maille, but they can be treated as unarmed.


Talking about those competent warriors, the Warriors. Farmers and other free adult men, Bondi in Viking terms, armed with a shield and a spear as a bare minimum. Spears may break, so they often carried an axe or (in case they were richer) a sword as a back up weapon. Most also had a helmet. A few of the richer ones may even have a coat of maille (mostly because I have more bodies in maille than I know what to do with).


These will make up the most of the viking troops, be they raiders or a more formal army in a shieldwall (never mind that vikings in SAGA does not have any ability evoking shield walls). Since at least SAGA doesn't differentiate between spears, swords or axes, slightly more than half of each unit is armed with spears, one guy has a sword (with possibly a second one with a scabbarded sword next to his spear) and the rest have axes (yes, a few have axes in their belts as well as spears)


Since I have three units of these, I need an easy wao to distinguish them. If one can read runes, one can tell that they're Bondi (it says so on the bases), but one might also need to distinguish between different units of Bondi next to each other. This is easily done by looking at the shields. Each shield has a unique-ish design, but the colours are the same throughout a unit. This makes one unit of blue and red shields, one of blue and yellow, and one of red and yellow. Most shields have simple geometric shapes, but two or three in each unit have more advanced shapes; a viking ship, a raven, a tree (intended to be an ash or oak tree and referencing Yggdrasil), or most commonly, a Valknut.


The Bondi, Warriors, however, do lack more formal training in warfare, and the usually don't have enough free time to master it. For that, you want something harder, the warlords sworn bodyguards, what the vikings called Huskarls or Hirdmen, in SAGA generally called Hearthguard. Bountifully equipped with maille, shields, swords and all they can want for, these are the elite of the elite. Spears are still plentiful, because the spear was the king of the battlefield, but every man also have a sword (and a fair few carry an axe, because you can never have too many weapons). Each unit also has one man with a banner, in case one wants to field such a thing.


Since I have two units of Hirdmen (as can be read on their bases by the rune-knowing), I need to be able to differentiate them. To tie them in with the Bondi, they all have three colours on their shields (red, yellow and blue, the three colours used on Bondi shields). The first unit has simple geometric shapes (and a few references), but the second unit is a bit more intricate. Each shield is divided into two fields, horizontally or vertically of different colours. Then a third colour is used to paint a figure or shape over those fields. Figures can be ravens, valknuts, ships or symbols from norse mythology (Thors hammer, Yggdrasil the Ash tree or Odins horse Sleipnir). In all, a mix of different stuff is attempted to avoid too regimental a look. The colours used remain red, blue and yellow.


If there is one viking word that everyone knows, it has to be Berserker. So of course I have a few figures for such. What exactly a berserker was, is not quite certain. Most agree that it was one kind of mad bugger that didn't care about his wounds all that much, though the exact mechanics of why differs. Interrestingly, a few sources seem to indicate that berserker can be used similarly to champion, with comparison to Charlemagne's paladins. In either case, among my vikings they are represented with guys in bearskin vests, ready to rend you into your constituent parts. In SAGA terms, they have an armour value similar to levies (so, no protective gear at all), but a buttload of attacks. I justify the shields by the fact that viking shields could also be used as a weapon by bashing people. The shields get three colours, since berserkers counts has Hearthguard in SAGA. Since neither the shields nor their bearers are expected to survive for long, they get somewhat simplistic designs, with runes to instill some extra semblance of power, one guy even evoking the Thurs rune (brave man, the Thurs, a.k.a. Jotunns a.k.a. Giants are not folks to summon lightly). In SAGA, they shouldn't really have two-handed weapons, but other systems often assume their counterparts do have.

They're quite possibly one of the most fun units in SAGA, even though they die very easily. Quite possibly, this is due to more often than not gutting an enemy unit as they die (the so-called semi-guided berserker missile), and if you're clever, you've designed your warband around the fact that they will die.


Finally, the boss, the big cheese, the Warlord himself Jarl Sigurd the Tall (it even says so on the base). Decked out in finest maille with a high quality sword at the ready. And, of course, the most intricate shield yet, granting that Odin Allfather himself will watch over him and behold his glory. Another brave man, but one does not lead Vikings while timid.

TO VALHALL!

All units are 12 men strong, the maximum allowed in SAGA, except the Berserkers (who can only be had in a unit of 4) and the Warlord (who is, naturally, alone), giving a grand total of 77 figures and 11,5 SAGA points.

/Fool out

2017-11-07

SAGA - What's this

Another miniature wargame that I play and have armies for: SAGA. It's supposedly getting a new edition soon (rumour has it early in 2018), but it might still be useful to do a run-down of what this game is.

In short, SAGA is a miniature wargame that is:

  • 28mm or 1/56 scale
  • Skirmish-sized, with somewhere between 25 and 73 miniatures for absolute maximum and minimum "standard-sized" games, more usually around 37 or so.
  • Rules made by Studio Tomahawk
  • Official models (more about this later) made by Gripping Beast
  • Historical, based around the Dark Ages (the base game), the first Crusade (SAGA: the Crescent & the Cross / version 1.5) and/or the fall of Rome (SAGA: Aetius & Arthur). My main focus is on the Dark Ages.
  • Uses d6 dice for everything.
  • Uses the time-tested "I go, you go" system where each player has a full turn (with some, but not much, input from their opponent) in turn.
  • Has a somewhat unique activation system and way of using special abilities within these turns.
Viking Jarl and Norman Come. Both counts as Warlords in SAGA

I should probably note that the rule system is the same for all periods (the Crescent & the Cross provided minor updates and clarifications, and is the current ruelbook), and armies are approximately balanced between periods (allowing your 11th century crusaders to fight against 6th century romano-brits), although balance is only guaranteed within an era, where most of the playtesting is done. For me, the system is mostly for the Dark Ages (or Viking Age, as it's known around here) because Vikings. I started the game because I wanted to paint some viking miniatures, and wanted a game to use them with... Anyway, moving on.

One major advantage of SAGA is that you're in no way limited by the official figures. Not only is it hard to trademark a viking warrior, meaning that many companies produce something suitable, there is only minor differences between a viking warrior and, say, a saxon warrior (essentially, one is slightly more likely to carry a cross) which means that one can quite freely mix and match figures that one likes.

SAGA also shows this in that figures are quite generic (don't worry, they still manage to differentiate factions). There are three levels of troops as well as your warlord (the boss, essentially you on the tabletop): hearthguard (the elite sworn warriors of the warlord with the best training and the best equipment), warriors (free men or militia, people with some training and equipment but not enough of it) and levies (the poor folks or even outright slaves, with little training, or stomach for the fight, and almost no equipment).

Hearthguards with various equipment

List construction is simple and robust. You get a warlord for free since every list must contain one. Then, for a standard game, you have 6 points with which to buy figures, with a varying number of figures for each point depending on quality (and you must use whole points for each type of figure). Finally, you divide these figures into units of 4-12, where each unit must contain only one type of figure, and all must have the same (if any) special equipment

Hearthguard have an armor of 5 (you must roll equal or above the enemy armor to hit them), corresponding to maille and a shield, and 2 attacks for each figure. They're also the most expensive at only 4 figures for a point. Next up, Warriors have an armor of 4, since maille is expensive, but a shield is cheap and very useful, and 1 attack for each figure, but gives you 8 figures for each point. Finally, levies only have an armor of 3, not even a shield, but are by far the most common source of ranged weapons, and you get 12 for a point. They have only 1 attack for every 3 figures, but where most units halve their attacks when using ranged weapons, levies instead increase theirs to 1 for every 2 figures (making them equal to warriors).

Warriors, the most varied unit type.

The warlord, being special, has an armor of 5 against melee and a mighty 6 against shooting, 5 attacks and a host of special rules including the ability to soak up one hit without worries, and sacrificing other figures to soak up more hits.

These base stats can be altered by faction special rules or by equipment options (given by each faction. Several factions can, for example, choose to equip some or all of their hearthguards (and/or warriors) with horses, making them faster, but lowering their armor against ranged weapons by 1, since horses are easier to hit. Another common option is two-handed weapons (most commonly axes), which reduce the armor of the carrying unit by 1 in melee, since you can't wield a large weapon and a shield at the same time, but also reducing the melee armor of any unit they're fighting by 1, since those axes don't really care about armor. Most levies (but not all), and some warriors and hearthguard, have an option of bows, or even crossbows. The armor of levies aren't affected by these, but warriors and hearthguard equipped with bows/crossbows lower their armor by 1, probably due to the lack of shields. On the other hand, some few levies have the option of forgoing bows for spears and shields, loosing their ranged attacks, but gaining 1 armor and attacking with 1 dice for every 2 models. Unless otherwise specifiec, all units are assumed to be armed with a hand weapon (which can be either a spear, an axe, a sword or something similar), that have no special rules.

Levies with bows. The least varied troop type
What makes SAGA special, and each faction special within the game, is the SAGA dice and Battleboards. Each faction gets a battleboard with abilities, 5 generic (activate a unit of a certain type, such as warriors) and 10 more or less unique for that faction. These battleboards are included with the rulebooks and expansionbooks, each book including battleboards for the factions within. Which can be a bit of an embuggerance, if you want the Viking battleboard, you need the first rulebook, despite it being superceded (in a few but important aspects) by a latter book. But at least they're not too expensive.

To use the abilities on your battleboard, you need to alocate SAGA dice. These dice are rolled in the beginning of each turn, two dice for your warlord if he's still alive and on the table, and one for each unit of warriors or hearthguard on the table (no dice for units of levies), up to a maximum of 6 initial dice. On each die, there is 3 symbols: the common one on 3 sides, the uncommon one on 2 and the rare on, on only a single side. Ordinary d6 can be used (with 1-3 corresponding to the common symbol, 4-5 with the uncommon one, and the 6 with the rare), but special SAGA dice are sold. Each faction have an intended dice set for use, and each set are shared between similar/related factions. For example, all "viking" factions share a set of bone white dice with runes on them, while celtic factions (scots and irish) have brown dice with gaelic images.

Each ability on the battleboard then requires specific symbols to activate, with more powerful abilities requiring rarer and/or more dice. So, to activate a unit of hearthguard (the most common ability, shared by all factions), any symbol can be used, but to activate the Norman ability "Aimed Volley" (a powerful ability that allows you to re-roll missed shots in ranged combat for a single activation), it requires not only a common symbol allocated, but also a rare one. Similarly, some abilities might get more powerful if a rare symbol is allocated.

Finally, there is a limit aside from SAGA dice in how much a unit can be activated, with any unit doing more than one activation of the same type (move or shoot), or fighting in a melee, gains one point of fatigue. These points can then be used by the opponent to decrease the effectiveness of the unit (being removed in the process), or left until the unit exhausts itself and can't do anything but rest.


/Fool out

2017-11-01

Blood & Plunder Battle Report - First naval battle

I finally had a chance to try out the naval rules for Blood & Plunder. I haven't been able to do it earlier, because neither did I have a good enough grasp of the rules to teach it and play at the same time (naval, that is), nor did I have any opponents with a firm enough grasp of the basics. That's finally been solved, so here we go.

As an aside, I provided all the models.


In the blue corner, French Buccaneers commanded by a Fool in a (foppy) Hat: an Experienced Commander, 5 Boucaniers, 2 times 6 Flibustiers and 8 Marins, all in the Sloop Jeanne de Flandre, armed with 6 Light Cannons.


And in the yellow corner, Spanish Guarda Costa commaned by the Man with the Beard (it's an impressive beard): an Experienced Commander, 2 times 6 Milicianos, upgraded to Trained, 2 times 6 Marineros and 6 Lanceros, manning the Brigantine Hermione with 8 Light Cannons


And we're off to a spiffing start, slowly inching forward in a Raid Scenario, exchanging wild musket volleys, with gun crews croaching by their charges, waiting for the opportune moment...


After a first, ineffectual, cannon salvo (and a very rapid reload), the French gets the first opportunity when the spaniard tries some fancy maneuvering (also known as "oh, bugger, there's a bloody island in the way"). That's a broadside of raking fire, which results in a Leak and a few casualties among the tightly packed spanish crew.

Well, thinks the French commander, this is going good. Let's now turn around and give them a taste of the rest of our guns...


... only to fuck up spectacularly and get some hot spanish cannonballs up the stern (and another case of "who put that island there", preventing as sharp a turn as would have been preferred). 5 hits are rolled, multiplied to 10 for stern action. The Fortitude of the Sloop is reduced to 2, which means 2 Critical Hits... and one of the hits are Lucky Hit at that.

Criticals/Lucky Hits are rolled; first one is a Leak, second one is a Catastrophic Hit (which gets rerolled to a destroyed cannon, and which creates another Leak). The Lucky Hit results in... another Leak.


The Sloop now has more Leaks than it has Deck sections, which means it's sinking. The Spaniard can safely turn away and watch the dastardly Frenchman go down to Davey Jones locker.

Whoops.

Lesson to be learnt: do not try to turn around anywhere close to where enemy ships can fire at your poor stern. Keep an eye out for islands and how they can affect your movement.
/Fool out.